Selective Color
It is to produce a black and white image that contains a hint or a splash of color. There are several ways to make an image black and white. I will be showing how to create a selective color photograph with channel mixer and gradient map in Photoshop.
Instructions
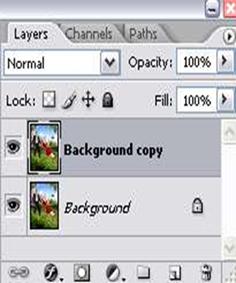
Ø On Photoshop- Open your image and duplicate the image layer.
Ø With the duplicated layer pallet, got to Layer> New Adjustment Layer> Channel Mixer. On the first pop-up window, click OK.
Ø Then, you’ll see the channel mixer window. Check the Monochrome box. Adjust the Red, Green, Blue, and Constant settings. Each image will have different settings. Experiment with the values until you find the perfect fit for your image.
Ø Sliding the slider to the right will bring out the white and sliding it to the left will increase the black on your image.
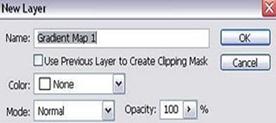 Ø Next, go to Layer> New Adjustment > Layer> Gradient Map. Click OK on the first pop-up window. Then select the Black and White gradient, and click OK. Now you should have a black and white image.
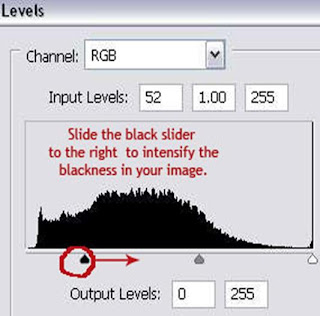 Ø Next, click on the eye icon to the left to make the original image invisible. Set the original layer back to the visible by clicking the box where the eye icon is, then click CTRL+SHIFT+E to merge all the visible layers. Now, you have a black and white image.
 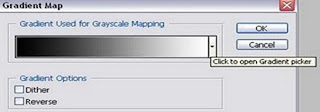 Ø With the black and white layer selected on the layer palette, click the >Add Vector Mask> icon at the bottom of the layer palette. Make sure the foreground color is set to black, and the background color is set to white. If it’s not, click D on your keyboard to set it to default, and use the small arrow to switch back and forth between background and foreground color.
 Ø Select the brush tool and choose a soft round brush. Set the brush size depending on the size of your image, then just paint on the area where you want the color to be visible with color.
Ø From the picture you’ll see that the read
Tip
If the selective color is not as intense as you would prefer, and want more vibrancy. With the original background layer selected in the layer palette, go to Layer> New Adjustment > Layer > Levels and adjust to likening.


 Ø Clone Stamp Tool


